Humans have been fermenting food as a means of preserving it for centuries. Today, we can enjoy the fermented delicacies that originated in many countries: miso from Japan, Chinese kombucha, Korean kimchi, Labneh – the thick, tangy Middle Eastern yogurt cheese, the thin crêpe known as dosa from India, and the pickled carrots, cucumbers, cabbages and beets developed in the northern and eastern regions of Europe.
So, what is fermentation?
Fermentation occurs naturally through the action of microorganisms (bacteria, yeasts and fungi). During the process, carbohydrates are transformed into acids, or into carbon dioxide or alcohols.
For an example of how the fermentation process works, take the common cucumber. To ferment this raw vegetable, it’s placed in salt water at or near room temperature. After some time, bacteria begin to multiply and lactic acid forms in a process known as lacto-fermentation. This does not mean dairy or whey has been included. Instead, it refers to the type of bacteria that multiply and the resulting lactic acid preserves the food.
Bacteria, along with lactic acid and yeast, form a cooperative culture. This fermentation process is similar to what happens when dairy is fermented into yogurt or cabbage is transformed into sauerkraut.
Fermentation has many benefits beyond it’s delicious taste. Fermented foods add natural enzymes, immune boosting detoxifiers, probiotics and vitamins to the diet.
Nuts, beans, grains and seeds contain substances that prevent the ability of digestive enzymes to break down the carbohydrates, fats and proteins that they contain. When seeds and grains are fermented, the enzyme inhibitors are then activated and these important nutrients can be digested. How cool is that? And so very good for you!!
Almost everyone can benefit from including fermented foods in their diets. Exceptions may include those that have sensitive or weakened immune systems. Those with chronic digestive issues or very low stomach acid may benefit from slowly introducing fermented items into their diets.
Making your own sauerkraut may seem like a daunting task, but it’s actually easy to prepare and just needs a little bit of babysitting as the fermentation process unfolds.
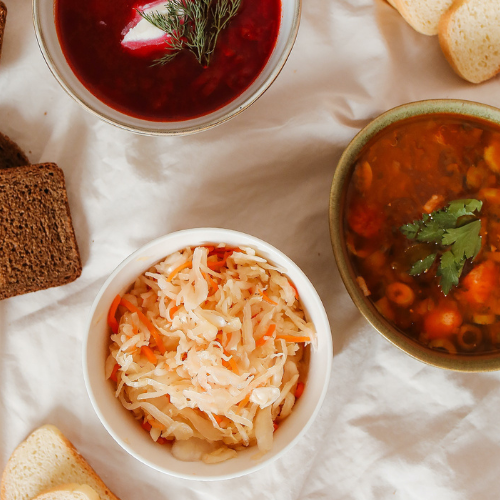
So I thought I would share my easy homemade sauerkraut recipe. This sauerkraut has all the flavor and probiotic benefits of a traditional fermented kraut but with less salt (this recipe is written for a lower salt content than the average at-home sauerkraut, but feel free to experiment to find what suits your personal taste). The cabbage has a great crunch and tang along with the added flavor from the caraway seeds. This is a traditional sauerkraut, perfect for adding to hotdogs or 1 T. a day straight from the jar works wonders.You don’t need any special tools to make sauerkraut—just cabbage, salt, a wide-mouth mason jar, and your hands. But there’s no need to stick solely to cabbage. Try using other vegetables in your kraut, such as carrots, red cabbage, Brussels sprouts, beets, or garlic, as well as other herbs and spices such as dill seeds, celery seeds, curry powder, or red pepper flakes. Just be sure to taste the mixture as you’re making it (to make sure your flavors are what you want) and then every three days after the fermentation begins. This will help you judge when the kraut has reached the point of being “done.” Again, it’s based on your personal taste, but it’s worth it to continue to taste the kraut at different times to know what you like the best.
And here’s the most important thing to remember—sauerkraut is best served in a cold state. If you warm it up or cook it, you’ll kill all the good bacteria and lose all the awesome probiotic potential.
Homemade Sauerkraut Recipe
Ingredients
- 1 3/4 pounds shredded green cabbage (from 1 head cabbage)
- 2 tsp. fine sea salt
- 1/2 tsp. caraway seeds
- 1 to 2 outer leaves from cabbage
Preparation:
- Combine cabbage, salt, and caraway seeds in a large non-metal bowl, squeeze and stir together, massaging cabbage with hands until cabbage softens and wilts, and has noticeably released liquid, about 5 minutes.
- Using a wooden spoon handle, pack cabbage mixture, a little at a time, into a wide-mouth quart jar. Add any remaining liquid in bowl to the jar or crock, leaving at least 2 inches of space at the top of the vessel.
- Place outer leaves of cabbage on top of cabbage mixture. This will help keep mixture submerged, and out of contact with open air. Weigh cabbage down with glass weights or another sanitized heavy object. Cover the jar with cheesecloth or a coffee filter fitted with a rubber band. If using a jar lid, twist until just barely tight.
- Over the next 24 hours, continue to press down on cabbage to help release liquid. The cabbage must be completely submerged underneath the brine. After the first 24 hours, if the liquid has not covered the cabbage, add water to just cover.
- Keep sauerkraut in a cool place (65°F to 75°F), away from sunlight. If using a jar with a lid, you’ll want to “burp” the mixture each day; unscrew the lid slightly to release CO2 that has developed. After 3 days, you can taste the sauerkraut mixture. As it continues to ferment, the flavor will evolve. When it has reached the desired flavor, fasten with a tight fitting lid, and refrigerate.
- While cabbage is fermenting, you will notice foam and white scum. This is natural, and the sign of a healthy fermentation. If you notice white mold, scrape it off, and make sure cabbage is submerged in liquid. If at any time black mold begins to show, throw the mixture away, and start again.
That’s it – in just a few days you will have a wonderful, fermented sauerkraut!
Let me know if you give it a go!
